Tuesday, December 22, 2009

Refining Mesh Subobjects

1. Create a mesh object with a smoothness level of 1 or higher
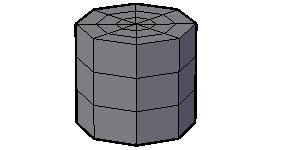
This is required to refine a mesh

2. Mesh Modeling tab > Subobject panel > Face
Mesh Modeling tab > Subobject panel > No Gizmo

3. On the box, CTRL + click to select a mesh face

4. Mesh Modeling tab > Mesh panel > Refine Mesh

5. The selected mesh face is divided into four smaller mesh faces

6. These are new mesh faces and behave like normal mesh faces
They can be edited normally

Rotate Mesh Subobjects

1. Mesh Modeling tab > Subobject panel > Face
Rotate as the Gizmo filter

2. On the object, select the faces wish to rotate.
Rotate Gizmo will appear


3. Hover the cursor over the axis wish to rotate about until it is highlighted

4. Enter an angular value to rotate and press ENTER
or Click + Drag the cursor

Note: Moving the cursor away from the object will permit more angular control

5. Press ENTER to complete the rotation

6. Apply a smoothness level to see the effects of these operations on the finished object

Moving Mesh Subobjects by Edges

1. Mesh Modeling tab > Subobject panel > Edge
The Gizmo should remain on Move

2. On the object, select the edges to move.
The Move Gizmo will appear

3. Repeat steps 5, 6, and 7 to move the edges

Moving Mesh Subobjects by Faces

1. Create a mesh object

2. Mesh Modeling tab > Subobject panel > Face

3. Mesh Modeling tab > Subobject panel > Move Gizmo

4. On the mesh cylinder, press CTRL + select to select the faces
The Move Gizmo will appear

5. Hover the mouse over the axis you wish to move along until it is highlighted

6. Enter a value for the distance to move the faces
or click and drag along the axis, making sure the highlighting is on when you click

7. Release the mouse button and press ENTER

Subobject Edits

The whole of the model create is object
Within the object there are subobjects called mesh faces
Mesh faces are bound visually by tessellation lines
Modify one or more faces using the 3D-Gizmo and move, rotate, or scale selected faces, edges, or vertices
If need to model at a higher level of detail, can create faces within faces using the mesh refining process

Sunday, December 20, 2009

Adding a Crease to Mesh

1. Create a mesh object

2. Mesh Modeling tab > Mesh panel > Add Crease

3. On the mesh object, select the faces to apply the crease to

4. For a sharp crease, press ENTER to accept the default value of Always

5. Sharp creases are applied to the selected faces

6. To remove creases
Mesh Modeling tab > Mesh Edit panel > Remove Crease
Select the creased faces and press ENTER

7. You can also vary the crease sharpness
When creating creases, override the default value of Always by entering a value between 0.1 and 2.0

8. Crease sharpness may be varied from face to face

Creasing Meshes


Apply a crease to a mesh face, edge, or vertex

A smoothness level must be 1 or higher to see the crease
When adding a crease, a value of 0.1 to 2.0 produces a softer edge
Setting all faces to a level of Always, then remove creases, will establish a higher level of control over your model

Smoothing Mesh Objects

1. Start with a known solid model or create a solid primitive

2. Mesh Modeling tab > Mesh panel > Smooth Object

3. Select the solid as the object to smooth and press ENTER
A converted mesh object should appear rounded

4. To make the black tessellation lines visible
Render tab > Edge Effects panel > Isolines

5. Mesh faces are bounded by the black tessellation lines

6. Mesh Modeling tab > Mesh panel > Smooth More
Select the object and press ENTER

7. To remove smoothness, in the Quick Properties panel, set the Smoothness to Level None

8. The mesh object should appear with sharp edges
The None level sets each face to have one facet

Smooth Object


Solid and surface legacy objects must be converted to mesh objects before smoothing can be performed

Smoothness levels: None and 1

Smoothing Meshes

Within each mesh face there can exist multiple facets 小平面
The number of facets within each face increases with higher levels of smoothness
All faces have the same number of facets

Smoothness
Level 1
all faces are divided into a matrix of 2 x 2 facets for 4 facets per face
Level 2
creates a 4 x 4 matrix of facets for 16 facets per face
Level 0
sets each face to only one facet

Splitting and Extruding a Mesh Face

1. Create a mesh box primitive

2. Mesh Modeling tab > Mesh Edit panel > Mesh Split Face

3. On the mesh box, select a face to split

4. Click on an endpoint to specify the first split point

5. Select another endpoint to specify the second split point

6. The rectangular face has now been split into two triangular faces

7. Mesh Modeling tab > Mesh Edit panel > Extrude Face

8. Ctrl + select to select a triangular face as the face to extrude

9. To specify the extrusion height, enter a value and right click , or move the cursor and click

10. The extruded face is completed

Set the smoothness to none when splitting and extruding faces