Saturday, June 5, 2010

Create a Cinematic Shot

1. On the ShowMotion controls
  • Move your cursor over the Exercise category, Start shot
  • Click Play
  • Click New Shot

2. In the New View / Shot Properties dialog box
  • View name: enter zoom in
  • View category: select Exercise
  • View type: select Cinematic
  • Transition type: select Cut to shot
  • Movement type: select Zoom In
  • Duration: adjust the value to 4 seconds
  • Distance: adjust the value to 650
  • Motion: select Starting Point
  • Click Preview. The preview should appear to fly through the door and look back at it
  • from the inside out
  • Click OK
3. Exercise category thumbnail > Play
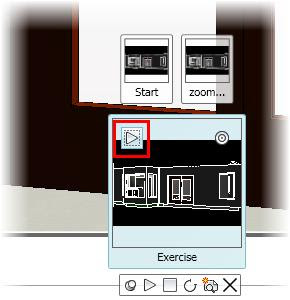
4. Show Motion toolbar > New Shot. New View / Shot Properties dialog box
View name: enter look right
View category: select Exercise
View type: select Cinematic
Transition type: select Cut to shot
Movement type: select Look
Duration: adjust the value to 6 seconds
Select Degrees right and set the value to 90
Motion: select Starting Point
Preview > The camera should turn to the right and point at the stove
Click OK

5. Exercise category thumbnail > Play
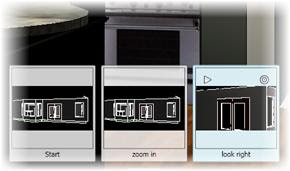
Ceate a New Shot

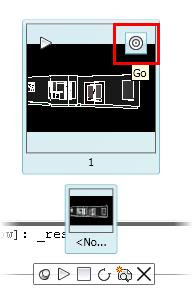
1. Move your mouse over the thumbnail labeled none, then the thumbnail labeled 1. Click Go

2. ShowMotion controls > New Shot

3.

Name: Start
View Category: Exercise
View type: select Still
Transition type: select Fade from black into this shot
Transition duration: 2
Duration: 3 seconds

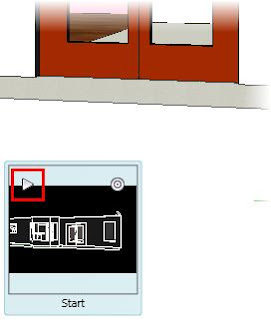
4. Move the mouse over the thumbnails labeled Exercise, Start. Click Play

New View/Shot Properties


  1. View Name: Specifies the view's name
  2. View Category: Specifies a category for the named view
  3. View Type: Specifies a view type of Still, Cinematic, or Recorded Walk
  4. View Properties: Controls whether the animation will continue with the first view after it reaches the last one
  5. Transition: Defines the transition type to use
  6. Motion: Defines the behavior of the motion to use
  7. Preview: Previews the transition and motion assigned to the view
  8. Loop: Continuously plays back the transition and motion assigned to the view

New Shot


Using ShowMotion, can add movement and transitions to named views and captured camera positions
These animated views are called shots

There are three types of shots:
  1. Still: comprised 包含of single stored camera positions
  2. Cinematic: utilizes 利用 a single camera position with additional cinematic camera movement applied
  3. Recorded walk: click and drag along the path of desired animation

Thursday, June 3, 2010

ShowMotion Presentation


Visually navigate between named views in the current drawing
Play a slideshow that will automatically cycle through all the views in a category

  1. Pin ShowMotion: Locks the ShowMotion control panel
  2. Play All: The current drawing automatically cycles through all the views in the selected category
  3. Stop: Stops ShowMotion
  4. Turn On/Off Looping: Controls whether the animation will continuously play back
  5. New Shot: Activates the New View / Shot Properties dialog box
  6. Categories: Displays a thumbnail image for each view category in the drawing
  7. Views: Displays the named views that are defined in the selected category
  8. Play: Enables to play shots and view categories
  9. View Go: Enables to move the camera to key positions while modifying shots or view categories
Right-click any of the view or category thumbnails

Arrange, delete, and edit the properties of the views

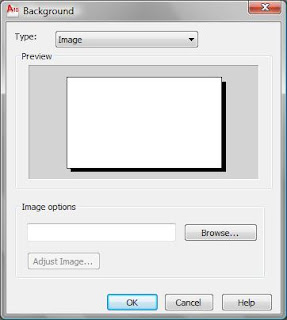
View Background - View Manager

View Manager > View > Background

Browse...

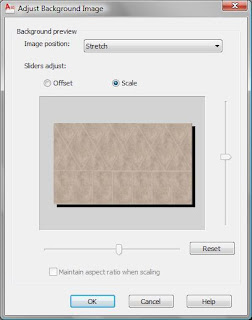
Adjust the image's position, offset, and scale values

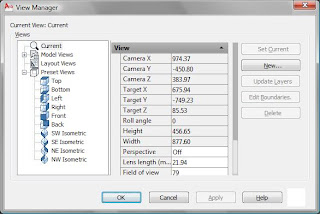
View Manager

Modify the view properties for custom views

Customize view
  • use the Layer Snapshot property to return layers in the view to the state they were in when clicked the Update Layers button
  • associate a specific visual style with the view
  • associate a live section from an existing section plane
  • configure a background override (solid color, gradient, or raster image)